There are two ways to do this:
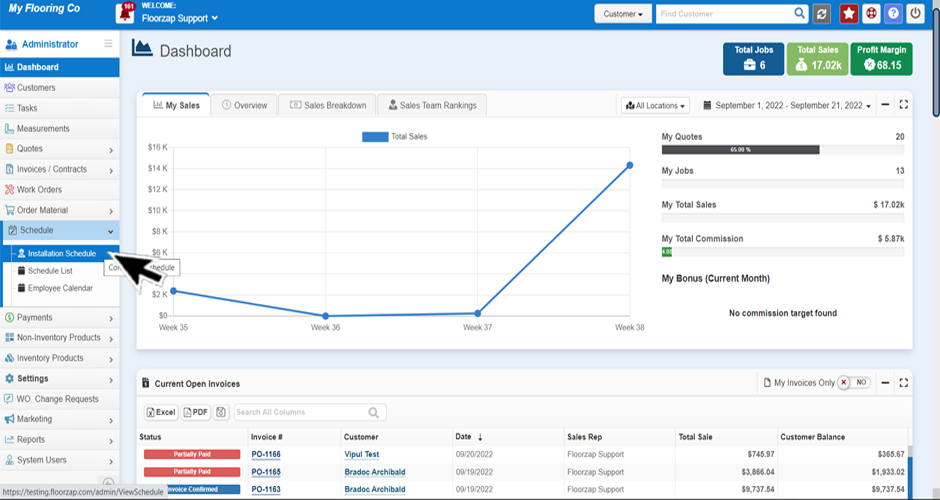
- First you will want to make sure you’re on the installation schedule page. Get there by selecting the “schedule” tab from the left-side menu on the dashboard and then click on installation schedule.

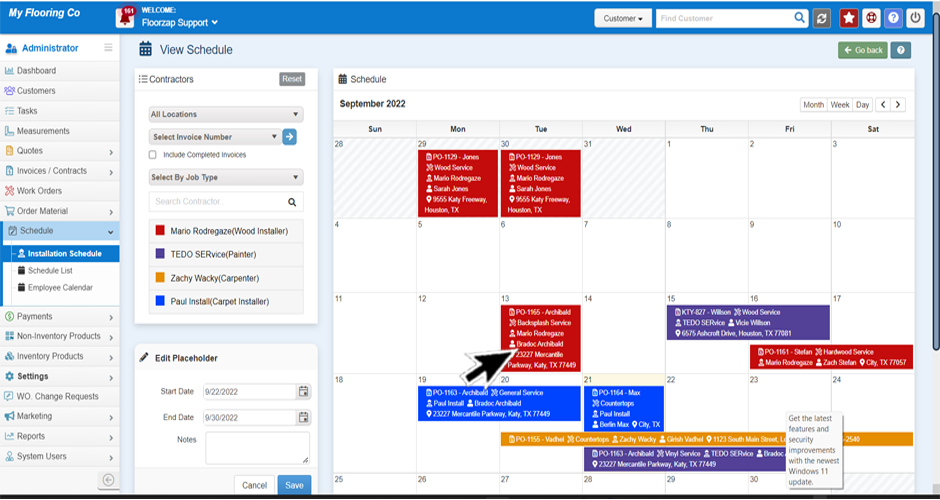
- Drag and drop (or click and pull) the item you would like to change to the new date.

Alternatively, you can follow these steps.
**Follow step one above to start if you’re not already on the schedule page.
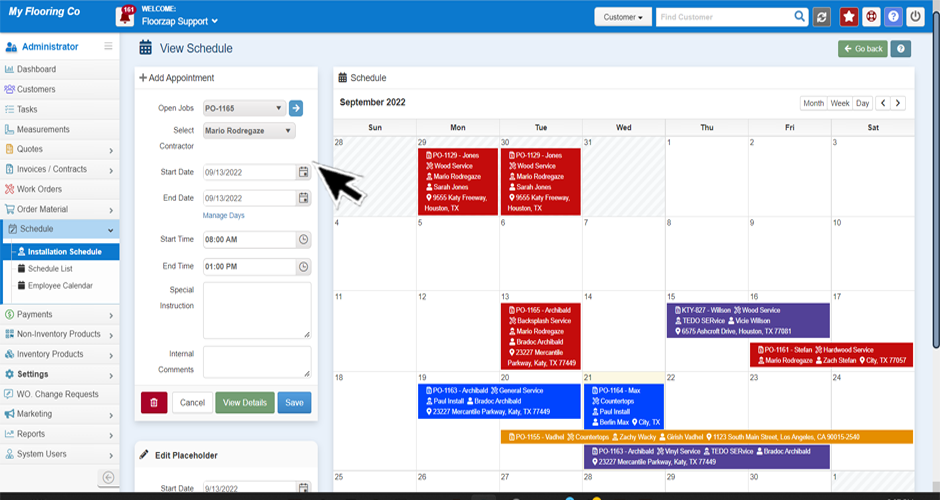
- Click on the date of the scheduled installation that you wish to change.

- Change the date/time and any other fields needed on the menu that is on the left-side of the page.

- Click save to save your changes.
